The Chery QQ3 arrived in South Africa in 2008 and at the time was the most affordable new car on the market. It can be had with either a 0.8-litre, 3-cylinder petrol motor producing 38 kW and 70 Nm of torque or a slightly bigger 1.1-litre, 4-cylinder petrol engine delivering 50 kW and 90 Nm of torque. On the inside, every derivative came fitted with an FM radio and CD player which offered a USB port for MP3 playback.
The TX and top-of-the-range TXE variants came standard with aircon, an optional item on the base TE derivative. The TX and TXE trim levels were also the only ones to offer four speakers and electric windows upfront and if a customer wanted the dual front airbags and ABS brakes with electronic brakeforce distribution, they had to opt for the TXE. However, all of these features are somewhat pointless if you cannot drive your Chery because of a flat battery, thus here is how you can replace it by yourself.
What do you need?
- Replacement battery
- Socket wrench with an extender
- 10mm socket
- Gloves
Let's get it done

Step 1: Locate the bonnet lever on the interior of the vehicle and open the bonnet. You will have to locate the secondary release lever at the front of the vehicle.
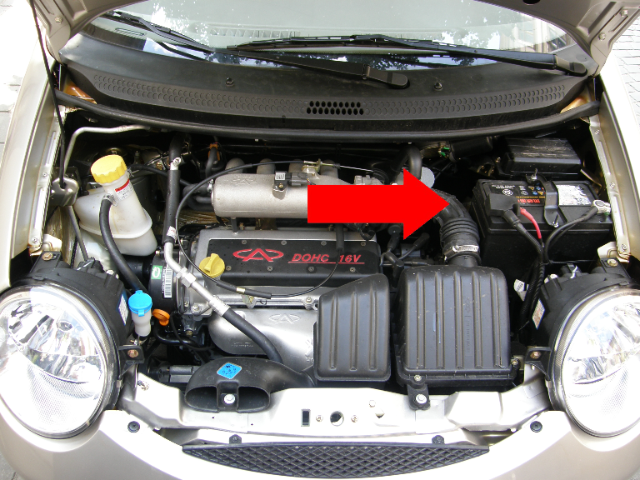
Step 2: Standing in front of the vehicle and facing the engine bay, you will see the battery located towards the right.

Step 3: Locate the negative pole of the battery which is indicated by a '-' symbol and the colour black. Using the 10mm socket and socket wrench, undo the bolt and remove the negative terminal from the battery and stow it to the side.
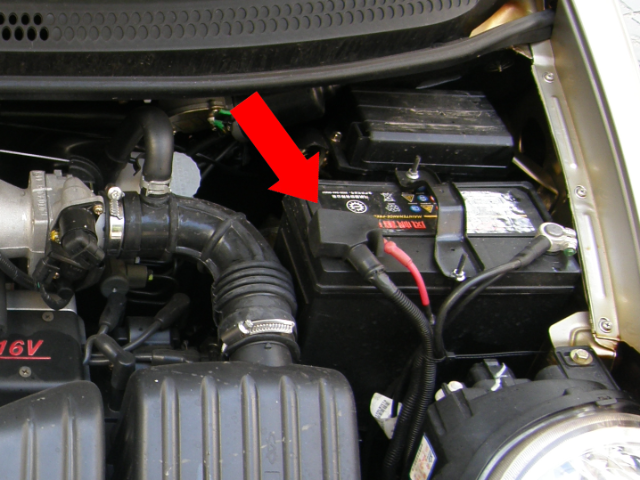
Step 4: Locate the positive pole of the battery which is indicated by a '+' symbol and the colour red. Lift the plastic cap and using the 10mm socket and socket wrench, undo the bolt and remove the positive terminal from the battery and stow it away from the battery.
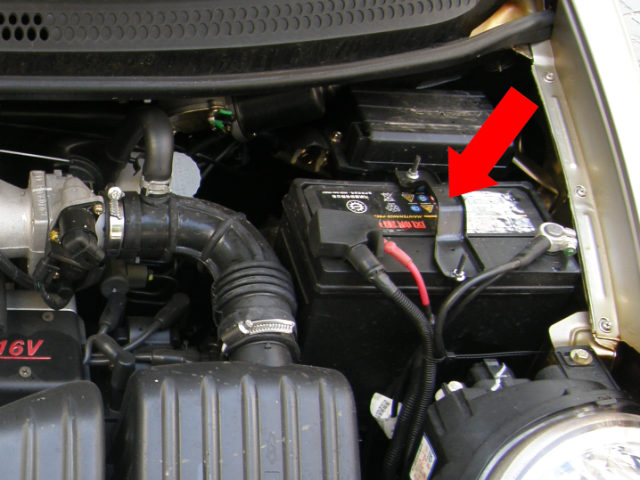
Step 5: You will notice the securing bracket keeping the battery in place. Using the 10mm socket and socket wrench, undo the bolts and remove the bracket to free the battery.
Step 6: Now you can continue to replace the old battery with a new one. Be sure to insert the new battery in the same orientation so that the negative pole is on the side of the negative terminal etc.
Step 7: You can now secure your new battery into place by following the instructions above in reverse order.
Step 8: Once all the steps are completed, the battery is installed, and you can now test it by starting the car.