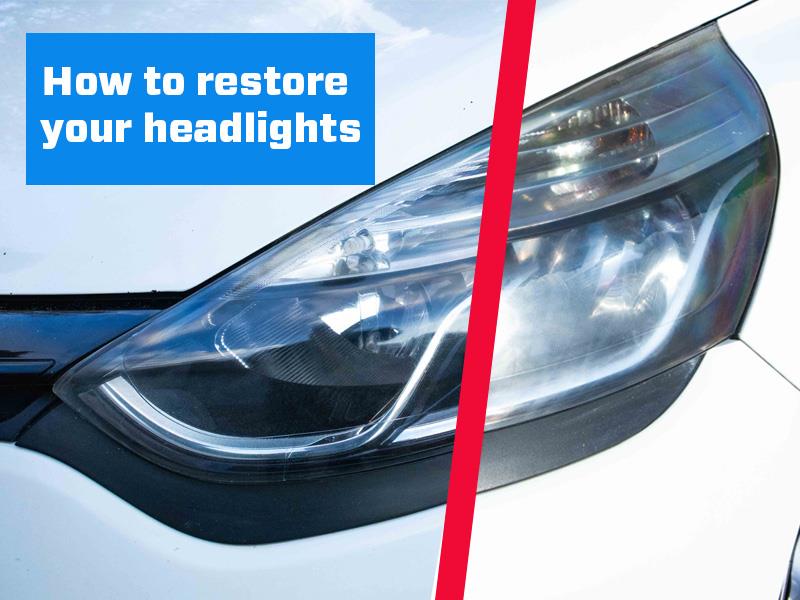
Since the advent of plastic headlights, yellowing of your headlights after some time is an everyday occurrence on our roads. Yellowing is caused by the UV protectant layer in the plastic lens fading away, thus resulting in a yellowed effect. Yes, they look unsightly, but this yellowing affects the functioning of your headlights in that it reduces the light output and also makes you less visible on the road. Buying new headlights can be very expensive, but yellowing can be relatively easy to sort and can be done with many methods.
Related: What is a VIN number?
In this article, we'll discuss one of the easiest yet most cost-effective ways of restoring your headlights.
Assess your headlights

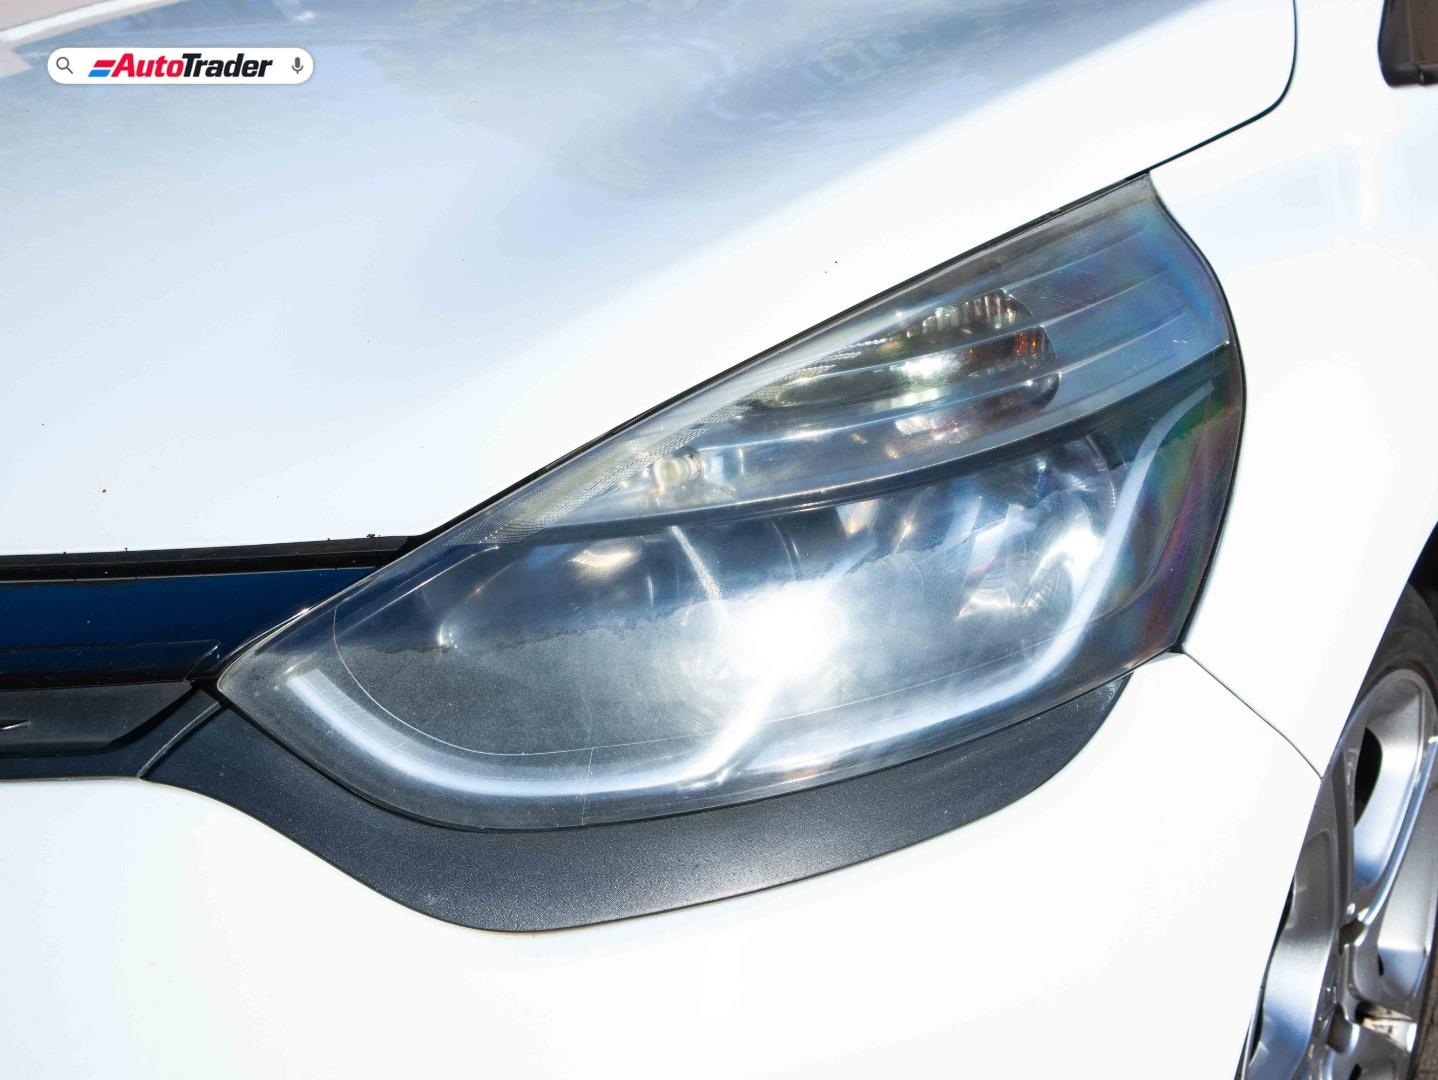
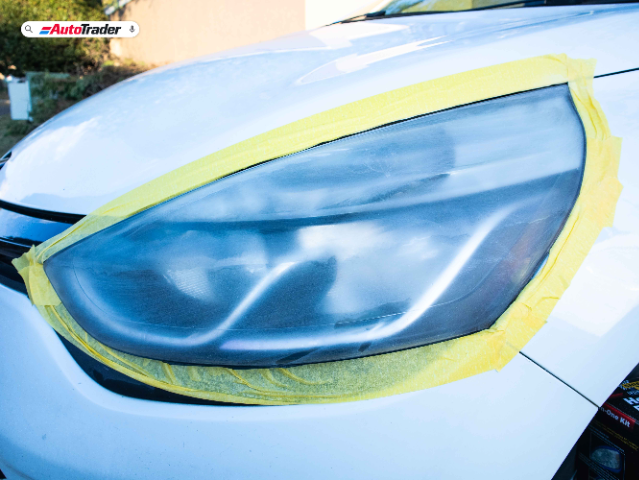
Picture here are some plastic headlights from a Renault Clio. After wiping down the headlights with a solution of soapy water and a microfiber cloth, we can get a clear idea of their condition. This set has yellowed on top as this is where the sun would typically shine on these headlights. General headlight restoration removes the yellowing from the lens and can remove some scratches, too. In this instance, there are some fine scratches and some deeper scratches, which unfortunately can't be removed entirely but at least can be bettered. Rock chips are difficult to remove, and unfortunately, there's not much you can do to fix the pitting from them apart from deeper sanding with various sandpaper grades. For the purposes of this tutorial though, you can at least better the appearance of them.
What tools will you need?
- Headlight restoration kit
- A spray bottle with soapy water
- Microfiber Cloth x3
- Cordless/Corded Drill
- Spray Protectant
- Disposable latex gloves
We'll use a Shield Headlight Restoration kit for this tutorial, as they are readily available at many hardware and automotive parts shops. These kinds of kits come with everything you need to do the restoration job in isolation, but some extra tools will help make the process easier and more effective. The soapy water solution in the spray bottle consists of a 90:10 mixture of 90% water and 10% car shampoo. Extra microfiber cloths to clean up while you work will help, and using fresh cloths in a few of the steps helps prevent cross-contamination that can hurt your final results. You don't need a Drill to do this job, but it will make the process easier. Lastly, a spray protectant like the Shield Ceramic Infused coating will keep the headlights from yellowing again. This spray protectant can also be easily found in many hardware and automotive parts shops. Just to protect your hands, wear some disposable latex gloves.
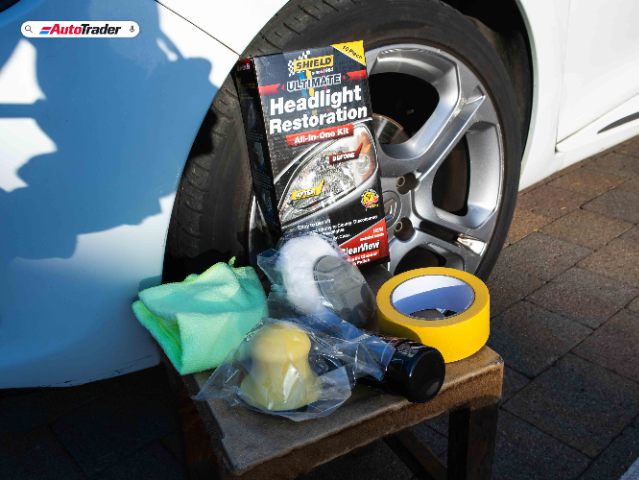
Inside the headlight restoration kit, you will find the following:
- Sanding discs
- Puck handle
- Masking tape
- 1x Microfiber cloth
- Drill polishing backing plate
- Wool polishing pad
- Polishing Compound
Restoration steps
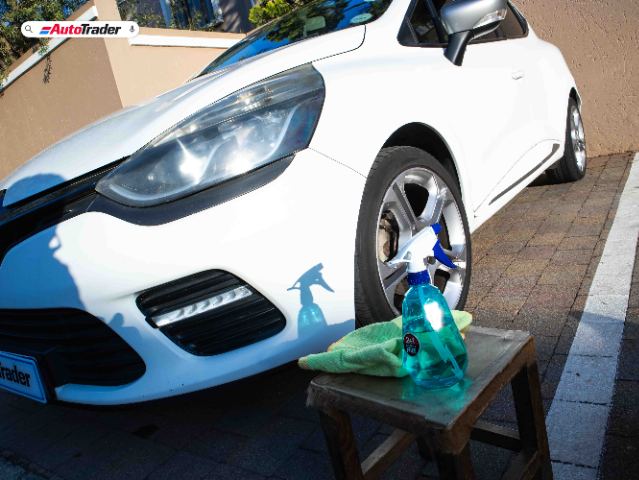
1. Clean up the headlights.
Fold up the one microfiber cloth enough to cover the palm of your hand. Using the soapy water spray and a microfiber cloth, spray over the headlights, and don't be shy about spraying over the surrounding paintwork, too, as this needs to be cleaned as well. Wipe down the area and let it dry.
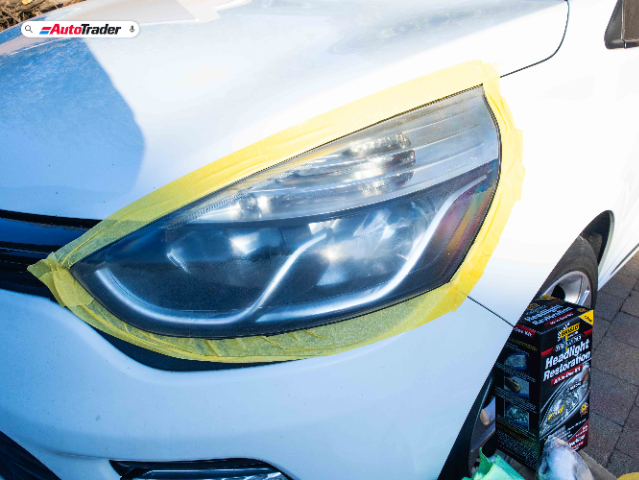
2. Mask off the work area
Open up your headlight restoration kit and whip out the masking tape. You're going to mask off your work area, and the reason is that you're going to be using sandpaper and polishing compounds, so you're not going to want to harm the surrounding paintwork. Take a strip of tape and slip one side of the tape in the gap between the headlight and panel to the point where you'll fold over the strip. It's better to mask off this way so you can sand and polish with confidence and knowing that you also won't nick the tip of the surrounding panels. Mask all around the headlight with a few strips of tape. You don't need uber-long strips; you just need enough to follow the curvature of the light comfortably. This tape is pretty wide, so you won't need to extend the masked area.
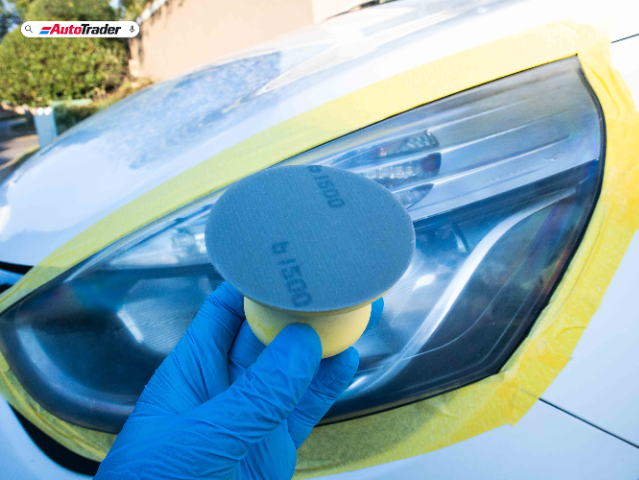
3. Start sanding
Inside the headlight restoration kit, you'll find several discs of 1200-grit sandpaper and a foam puck with velcro to attach the sandpaper to. The sanding method we'll use here is wet sanding, so all you'll have to do is spray down the headlight with the soapy water again and with the sanding puck, using circular motions, sand down the headlight from top to bottom and side to side.
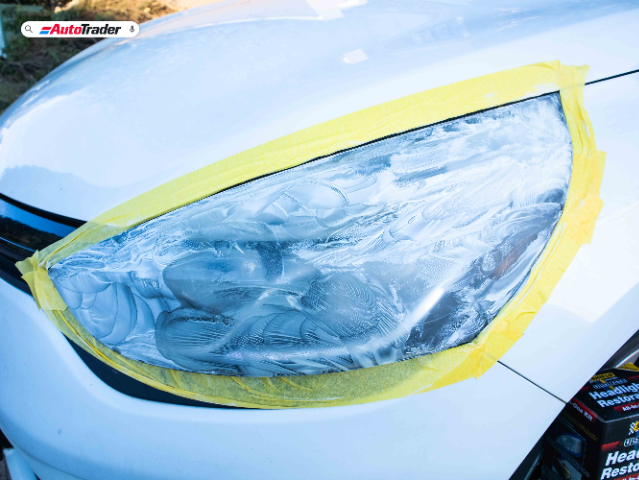
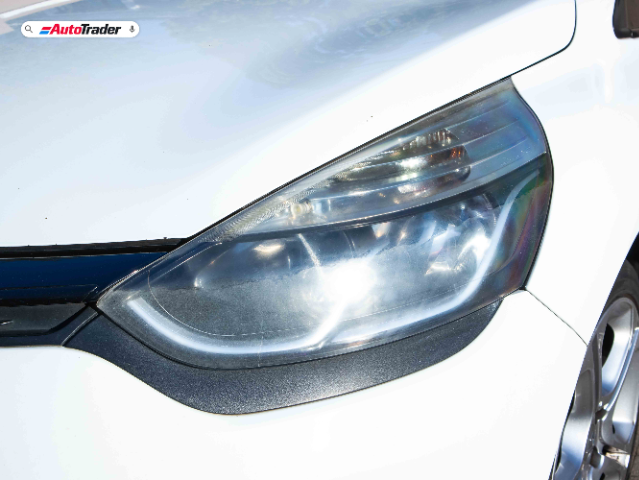
You'll start to see pasty milky material coming off, which means you're sanding off the expired lens coating. Do not fear; that's the sanding doing its job. Keep the area lubricated as you sand, and spray and wipe down the lens to check your work and make sure you haven't missed any spots. The headlight will start to look cloudy as it dries. Any leftover yellowing will require more sanding sessions.

The headlight once dried off will look hazy like this:
4. Start polishing
Next, you can start polishing to eliminate the sanding marks and minute yellowing. Inside the headlight restoration kit, you'll find a polishing compound tube and drill backing plate with a wool polishing pad. Now, it's advised to use a household machine drill with this process, but if you don't have one, you can still polish the headlights using the polishing compound and wool pad by hand, but it will just take more elbow grease to do. For this article, we used the advised drill method. Setting up the drill with the backing pad and wool pad, you'll want to prime the wool pad with some polishing compound by applying at least three pea-sized dots and rubbing the compound into the wool pad. Once primed, add 3 more pea-sized dots to the wool pad and dab the wool over the headlight to distribute some of the polish.
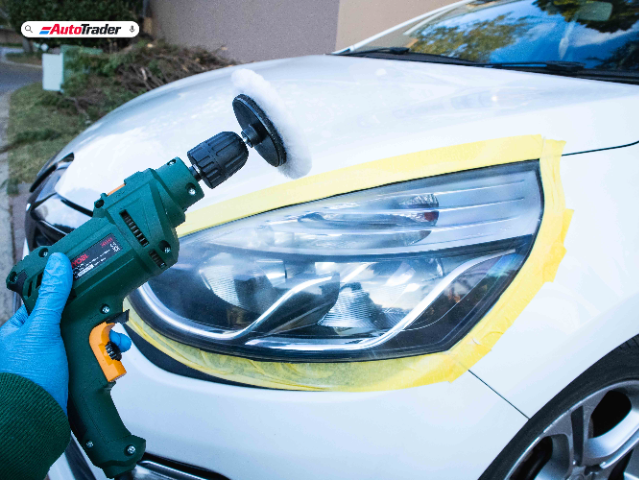
On a very low speed, turn on the drill and run the wool pad across the headlight lens to spread the polish evenly, which helps prevent slinging. Once spread, crank up the drill speed to near maximum and move the polisher slowly across the headlight from top to bottom and side to side. Don't let the polisher stay in one spot, as this will heat up that area of the headlight and will result in damage to the lens. You'll know the area is polished once you see the polish is worked in to form a very light haze. Switch off your drill, remove the microfiber from inside the restoration kit, and wipe off the polish.
Check your work, and if you can see that perhaps some minor scratches can be further removed, feel free to polish it again. If you're happy with the results, you can now remove the masking tape.

5. Protection
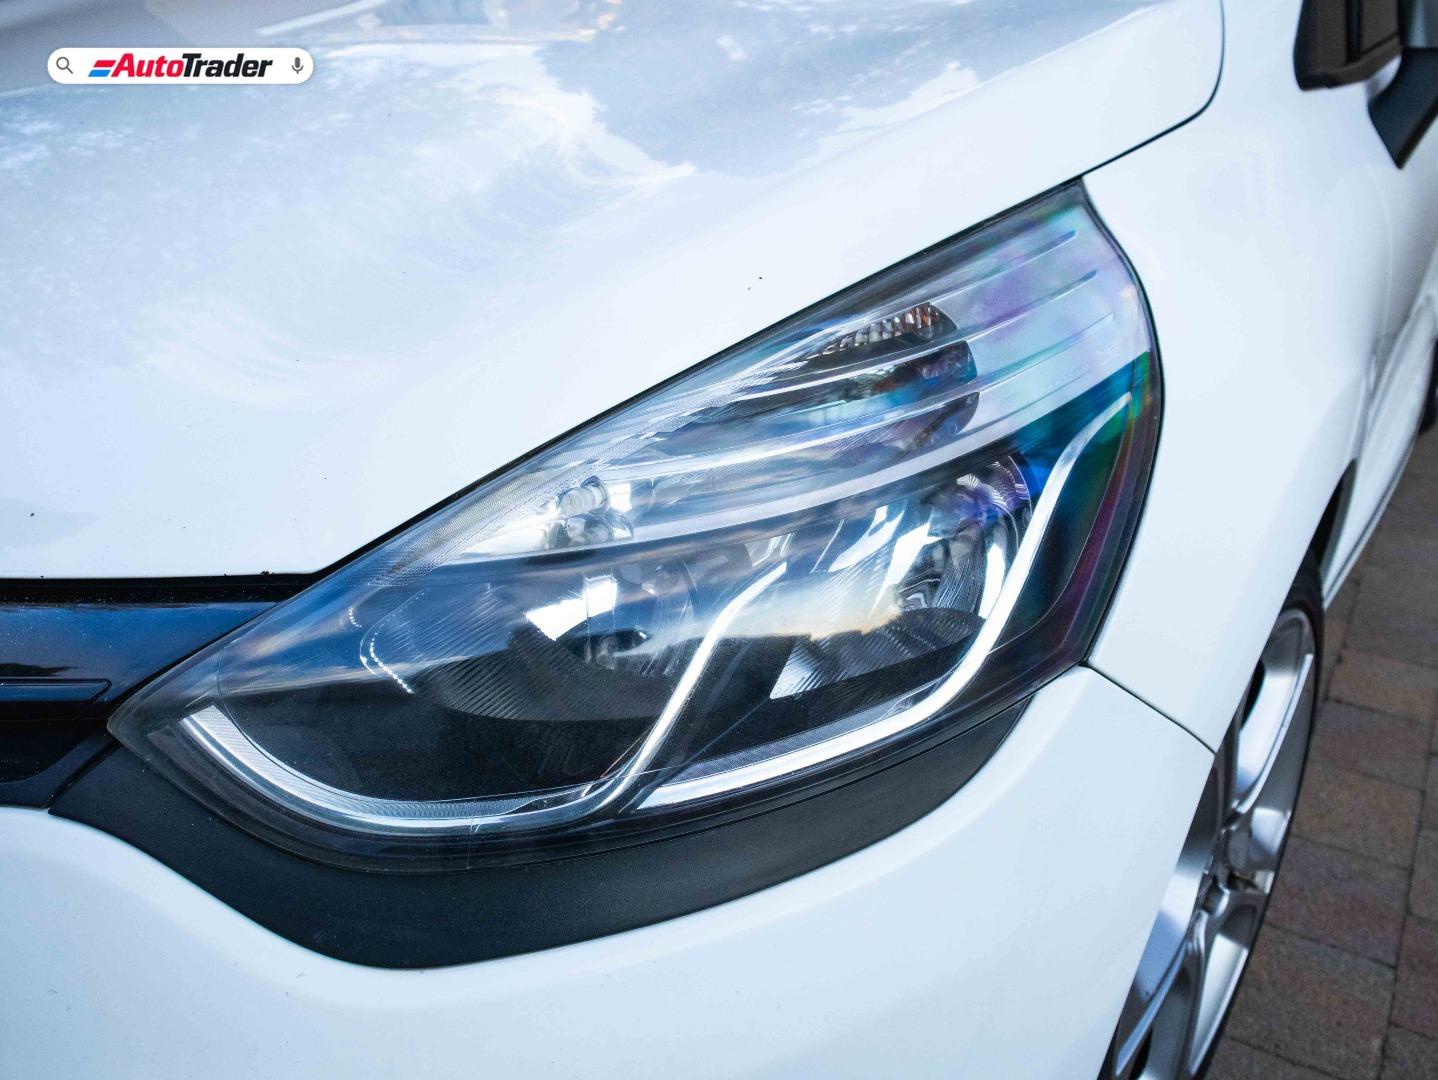
Using the soapy water solution and a fresh microfiber cloth, spray off and wipe down the headlight. Using another fresh microfiber cloth and the Spray protectant, spray the protectant onto the headlight and wipe it down using the fresh microfiber cloth. You'll not only see a lovely gloss on the headlight lens, but the lens will now be protected from yellowing. Depending on how the car is washed and stored, the protectant can last anywhere from 3-6 months. Topping up at every wash will help prolong the protection, too.

6. Marvel at the results
While we can't guarantee that you'll have a 100% restored headlight, your headlights will look much better, and you will have a much better chance of passing a roadworthy test. This is just one the ways you can easily restore your headlights to be a better condition. You may want to wash the car afterwards as there is some water runoff from sanding and dust from polishing.