
How to replace the car battery of a Toyota Etios
One of the advantages of owning a conservatively-engineered vehicle is that many maintenance jobs can be performed at home, and without the need for any particular aptitude or special tools. In this step-by-step guide, we show you how to replace the battery in your Toyota Etios. It’s quick and easy, and won’t take more than a few minutes to do.



First off, let’s get some basic points regarding car batteries out of the way. Safety is always of primary concern, which is why we recommend disconnecting the battery as a first step before commencing any work. Doing so reduces the risk of accidental short-circuits occurring, and could free up some extra moving space for spanners. Also take great care never to short-circuit the battery terminals.
Related: What is covered under the Toyota Etios manufacturer warranty?
In the Toyota Etios, the battery is located in the engine bay, on the passenger side of the car and close to the windscreen (illustrated with the blue block and arrow). There’s nothing else in the way, with main wiring harnesses and peripheral equipment mounted at a convenient distance to give your hands plenty of space to move around. This obviously makes the battery replacement procedure even more simple.

Let’s get started!
1. The first step is to loosen and remove the battery terminals. You will need a 10mm spanner to release the cable terminals from the battery posts, with the negative terminal being the first to be approached. Simply release the locating nut, pull the cable terminal from the battery, and then move it aside.


The positive terminal follows the same procedure, with the exception of a small red plastic terminal cover which needs to be unclipped first.

Remove the positive (red) terminal next, following the same technique as for the negative terminal.

2. Loosen the battery locating clamp nuts. Use the same 10mm spanner with which you disconnected the terminals to loosen both clamp nuts, then proceed to remove the rear locating nut completely. Further loosen the front locating nut, until the bracket unhooks from its mountings and can be put aside.


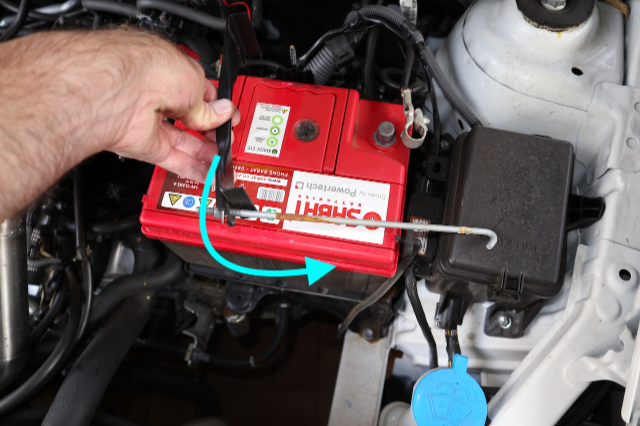
3. The battery is now loose, and can be lifted out of the battery tray. In the case of this demonstration vehicle, the battery has a convenient red plastic handle to offer an easier grip, and your car’s replacement battery will likely have similar handles. Use it as intended, then simply clip it out of the way into the hidden position once the new battery has been placed into its slot.

4. Insert the replacement battery into the vacated space, and re-assemble in the reverse order of the removal process. Ensure that the battery is located securely in the middle of its plastic mounting tray before re-fitting the battery locating clamp. Don’t over-tighten the battery locating clamp or terminals, as doing so may bend the clamp or damage the cable terminals (or the new battery itself): once all the free play is taken up, it’s tight enough.
5. Finally, once everything is complete again and you’ve checked that the car starts, close the bonnet, and congratulate yourself on a job well done.
Related: Everything you need to know about buying, owning and selling a Toyota Etios.
If you’re not quite at ease working on cars, this simple operation may at first appear to be somewhat daunting. But, if you enjoy a bit of a challenge and have the right tools at hand, you’ll be satisfied at overcoming this uncomplicated maintenance task.
* This article was created as an advisory piece. AutoTrader SA does not accept any responsibility for possible damages incurred by individuals or workshops following these instructions. If in doubt, please consult a professional auto technician or battery retailer.