

The timeless Land Rover Defender enjoyed a long and celebrated life, spanning from 1983 (and even earlier with the Land Rover Series dating back to 1948) all the way to its eventual discontinuation in 2016. It was replaced with the new Defender in 2020 featuring an all-new design and underpinnings loosely based on the Land Rover Discovery. This model features significantly more tech and electronics than before, making it a contemporary offering by today's standards. This model is known as the L663.
Related: All-new Land Rover Defender finally launches in South Africa
The L663 model is fitted with LED headlamps as standard fitment locally. This increases their lifespan and ensures unparalleled visibility at night and in adverse conditions. This also means that the units are not serviceable and should you encounter a headlight failure, you will be required to have the unit replaced in its entirety.

For those with pre-2016 models, switching out a headlight bulb is a fairly simple task, albeit a little involved and possibly more time-consuming than other vehicles.
Tools required
- Replacement H4 headlight bulbs
- Phillips-head screwdriver
- Soft cloth or gloves
How to
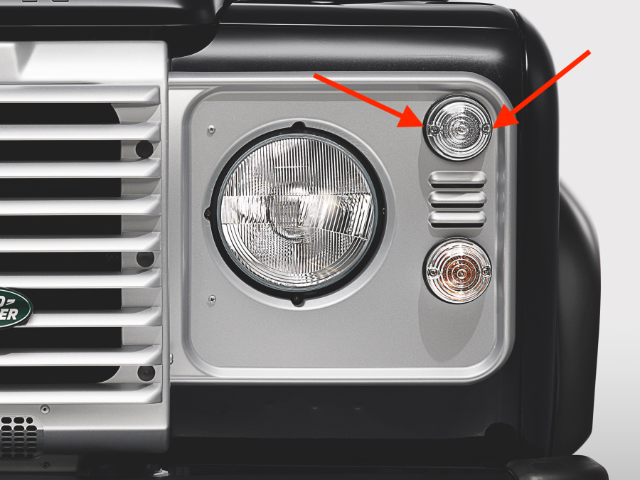
1. Using the Phillips screwdriver, undo the two screws holding the park lamp in place.
2. Pull out the park lamp and unclip the electrical connector. Place the lamp one side.
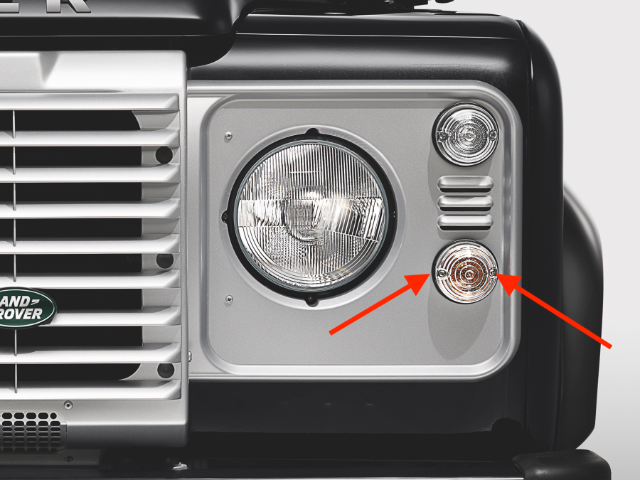
3. Undo the two screws holding the indicator in place.
4. Pull out the indicator and unclip the electrical connector. Place the indicator one side.
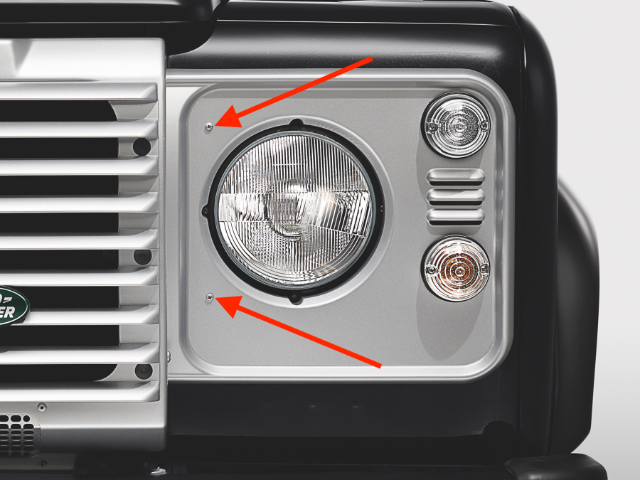
5. Undo the two garnish plate screws and remove the garnish plate.
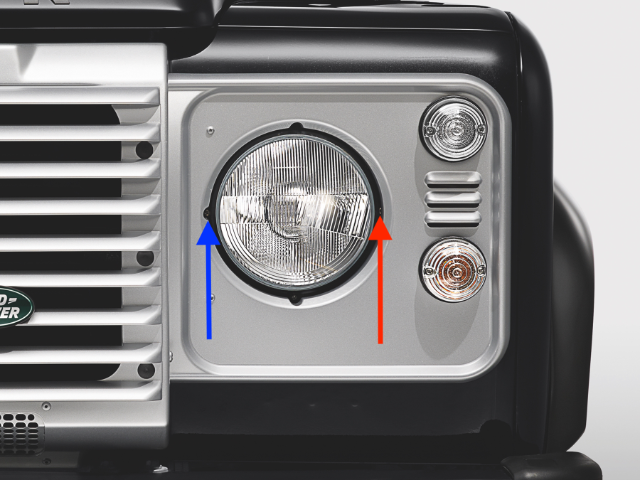
6. The retaining ring for the headlight will now be visible. Loosen, but don't remove, the left-most screw at the 9 o'clock position (blue arrow).
7. Remove the retaining screw at the 3 o'clock position (red arrow).
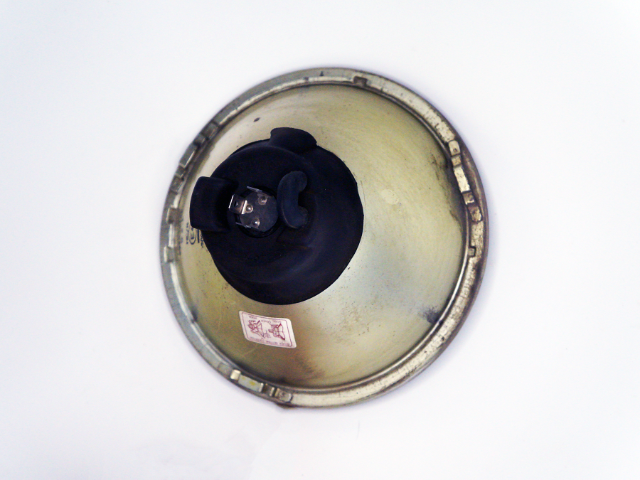
8. Remove the headlight from the housing and unclip the electrical connector.
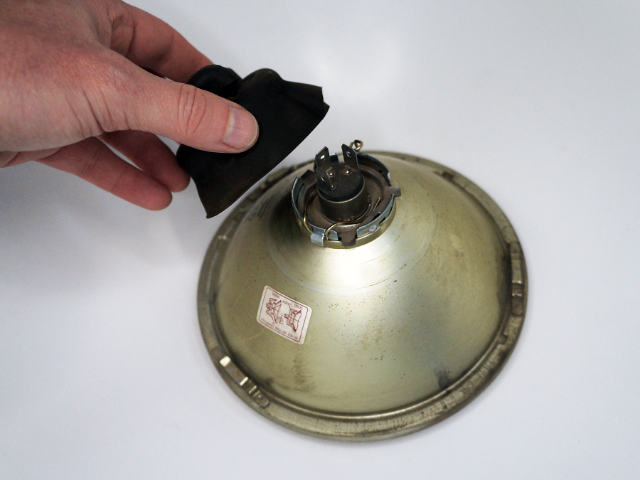
9. Remove the rubber boot.
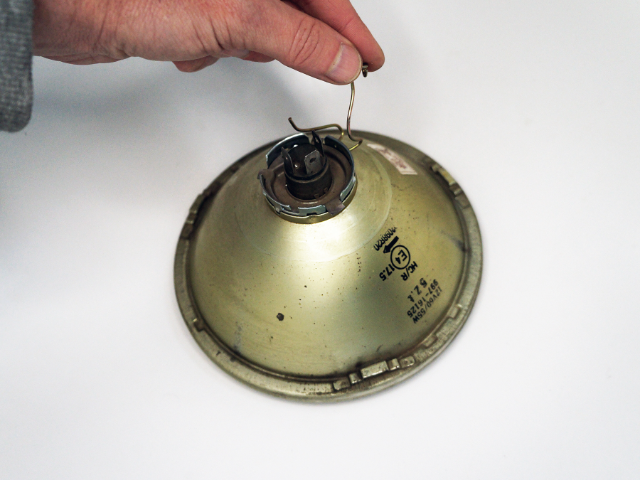
10. Unclip the retaining clip on the back of the headlight bulb by pressing down on the arm.
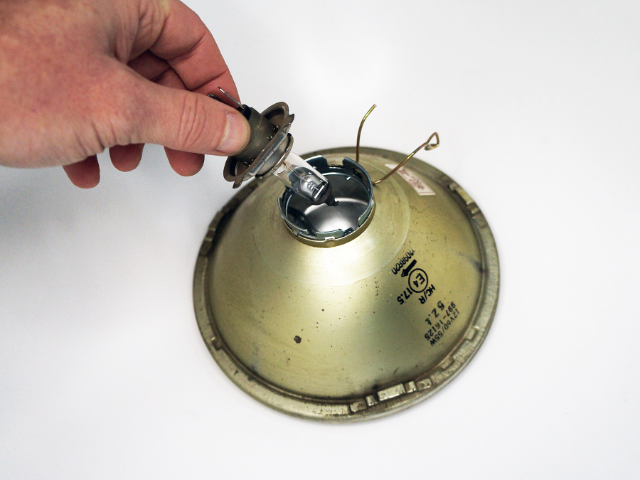
11. Remove the bulb.
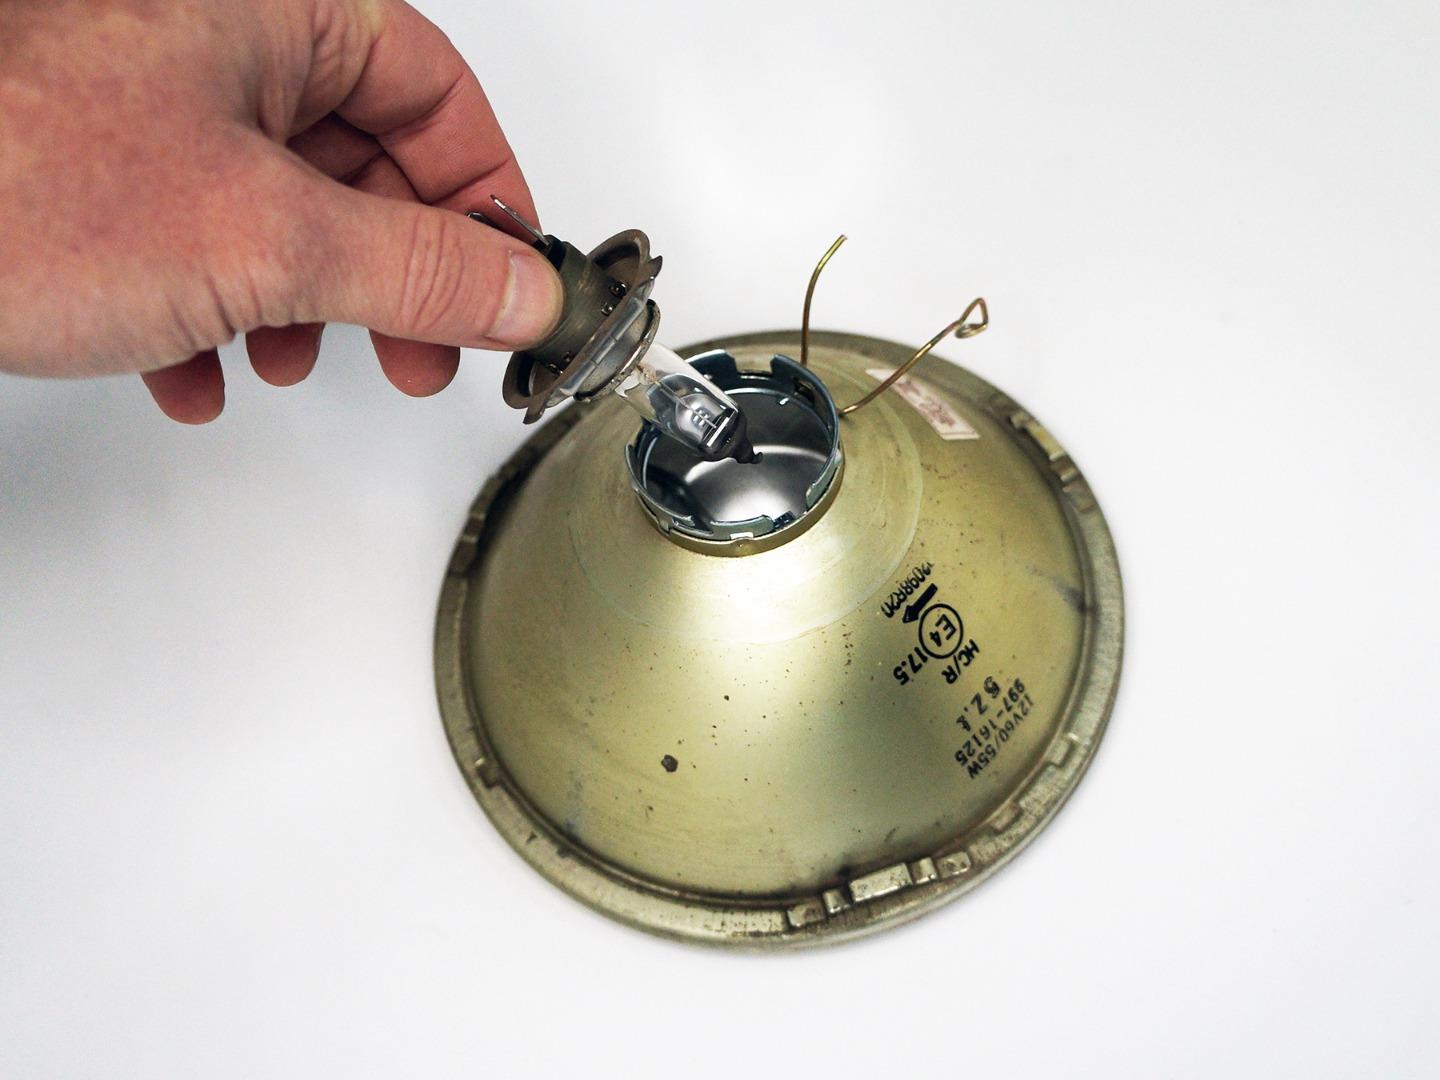
12. Insert the new H4 bulb, taking care not to touch the glass with your bare fingers.
13. The reinstallation is the reverse of the removal.