
The Geely LC launched in South Africa in 2011 and a year later the Geely LC Cross touched down. Offered in three trim levels namely the GS, GL and GT, all three Geely LC derivatives was offered to the public for under R100 000. Under the bonnet features a 1.3-litre petrol engine developing 63 kW and 110 Nm of torque.
While new models were sold with a 3-year / 100 000km warranty and AA roadside assistance, customers could choose between either a 2-year / 60 000km or 3-year / 90 000km service plans, both at an additional cost. These plans, however, still wouldn't have covered the battery as it is considered a wear and tear item. Luckily replacing the battery is not difficult and with our step-by-step guide, you can do it at home.

What do you need?
- Replacement battery
- Socket wrench with an extender
- 10mm socket
- 13mm socket
- Gloves
Procedure
Step 1: Move the vehicle in a well-lit area and pull the bonnet lever in the footwell.
Step 2: Go to the front of the vehicle and locate the bonnet release latch and open the bonnet. Secure the bonnet in place with the support rod.

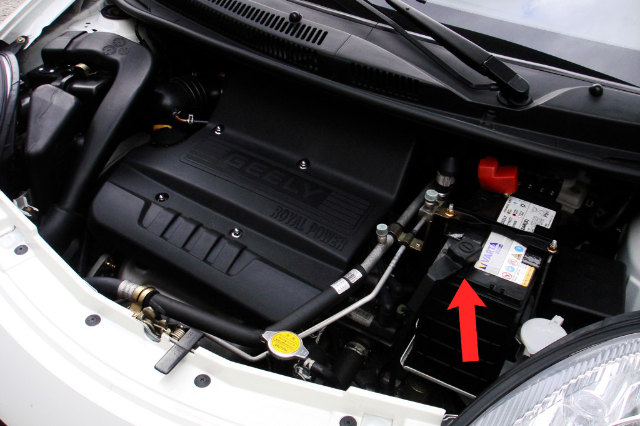
Step 3: Locate the battery on the passenger side of the engine bay.

Step 4: Lift the plastic cover on the negative terminal, the negative terminal is indicated with a '-' symbol and is black.
Step 5: Using the 10mm socket and the socket wrench, loosen the bolt securing the loom to the negative terminal. Stow the loom to the side and out of the way.
Step 6: Now lift the plastic cover on the positive terminal, indicated with a '+' symbol and coloured in red.
Step 7: Using the 10mm socket and the socket wrench with the extender, loosen the bolt securing the loom to the positive terminal. Stow the loom to the side and out of the way.

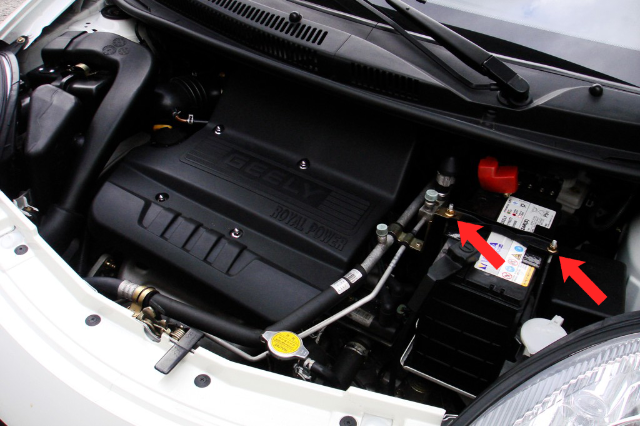
Step 8: Using the 13mm socket and the socket wrench, undo the two bolts on the securing plate on top of the battery.
Step 9: You can now proceed to lift the old battery out of the vehicle and install the new battery. Be sure to orientate the new battery in the correct way.
Step 10: Following the steps in reverse order, you can now secure the new battery into place. Be sure to not overtighten any bolts as that could damage the thread.