
How to change wiper blades on your Honda CR-V
How to change wiper blades on your Honda CR-V



By Stuart Johnston
Honda’s CR-V has been its benchmark SUV offering in South Africa for over two decades. Here’s an easy step-by-step guide to help you change the wiper blades on your CR-V, in just a few minutes
Honda’s CR-V has been sold in South Africa for the past two decades. The latest model is the fifth-generation car, and it is powered by either a two-litre naturally aspirated engine or a 1,5-litre turbocharged engine. Both of them are petrol-fueled in this generation, although previous offerings of the CR-V included diesel models. For a review on the latest Honda CR-V click here.
Let’s check out the wiper blades.
The nice thing about Honda is it doesn’t try to re-invent the wheel, when it comes to the equipment on its cars. Thus the wiper arms and operation on all Honda CR-Vs are conventional with two wipers for the front screen. The driver’s side blade has the bigger sweep and is thus longer than the passenger-side blade.
When do I need to change wiper blades?
When your wiper blades start squeaking and juddering on a wet windscreen, this is the time to replace them. Some wiper blades wear out quicker than others, especially if the blades have been subject to very cold temperatures for long periods, or the car has stood outside in direct sunlight for a long time.
You will also know that something is wrong when the blade leaves un-wiped streaks on the windscreen, making it difficult to see out during a rain storm. This is the time to change those blades, and it is a quick and easy job. But there are tricks to it.
Step by step guide to replacing the CR-V wiper blades
1. Measure the length of the two blades before visiting the spares shop, to make sure you are getting the right item. Also check out what the retaining catch section of the blade looks like.
2. The best place to replace the blades is right outside the spares shop, so if there are any doubts about the new blades being the correct items, you can exchange them right there and then. You don’t need any tools to replace the wiper blades on a Honda CR-V,
3. Flip the driver’s side wiper up and away from the screen. The wiper arm is spring loaded, and there will be a small amount of resistance to working it away from the screen, but continue folding the arm upwards, until it clicks into place at 90 degrees to the windscreen.
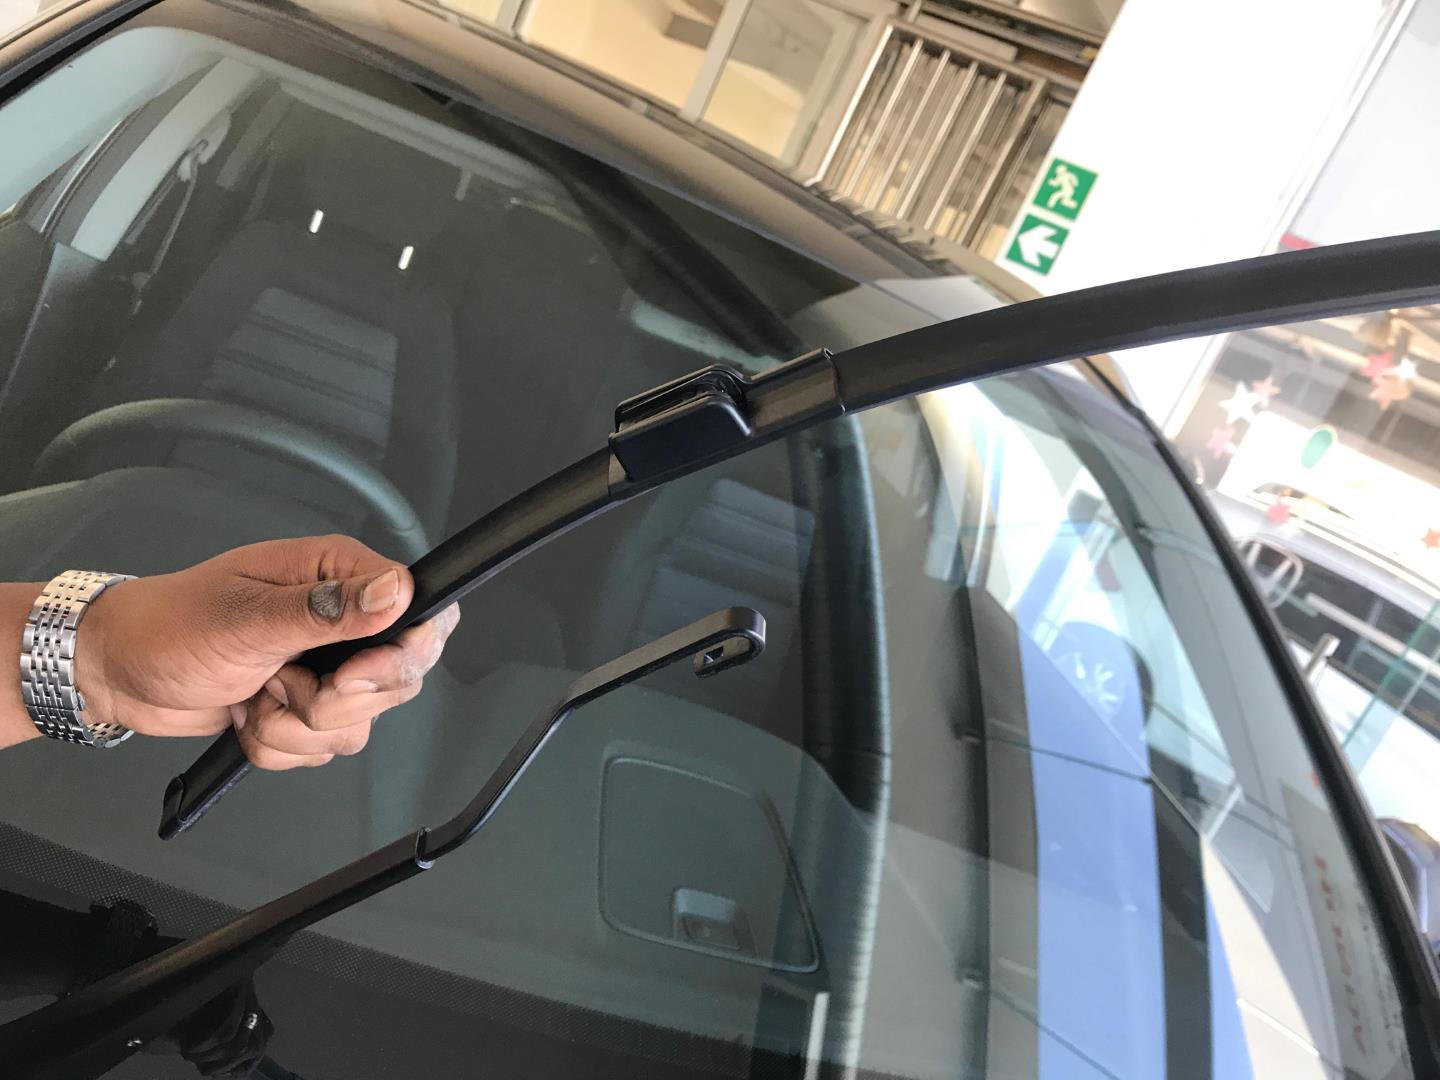
4. Note that the wiper blade now swivels freely on the arm. To understand how to remove the blade, realise that essentially the two arms are just flat metal strips with a 180 degree hook (like a shepherd’s crook) at the end, where the blade fits on.
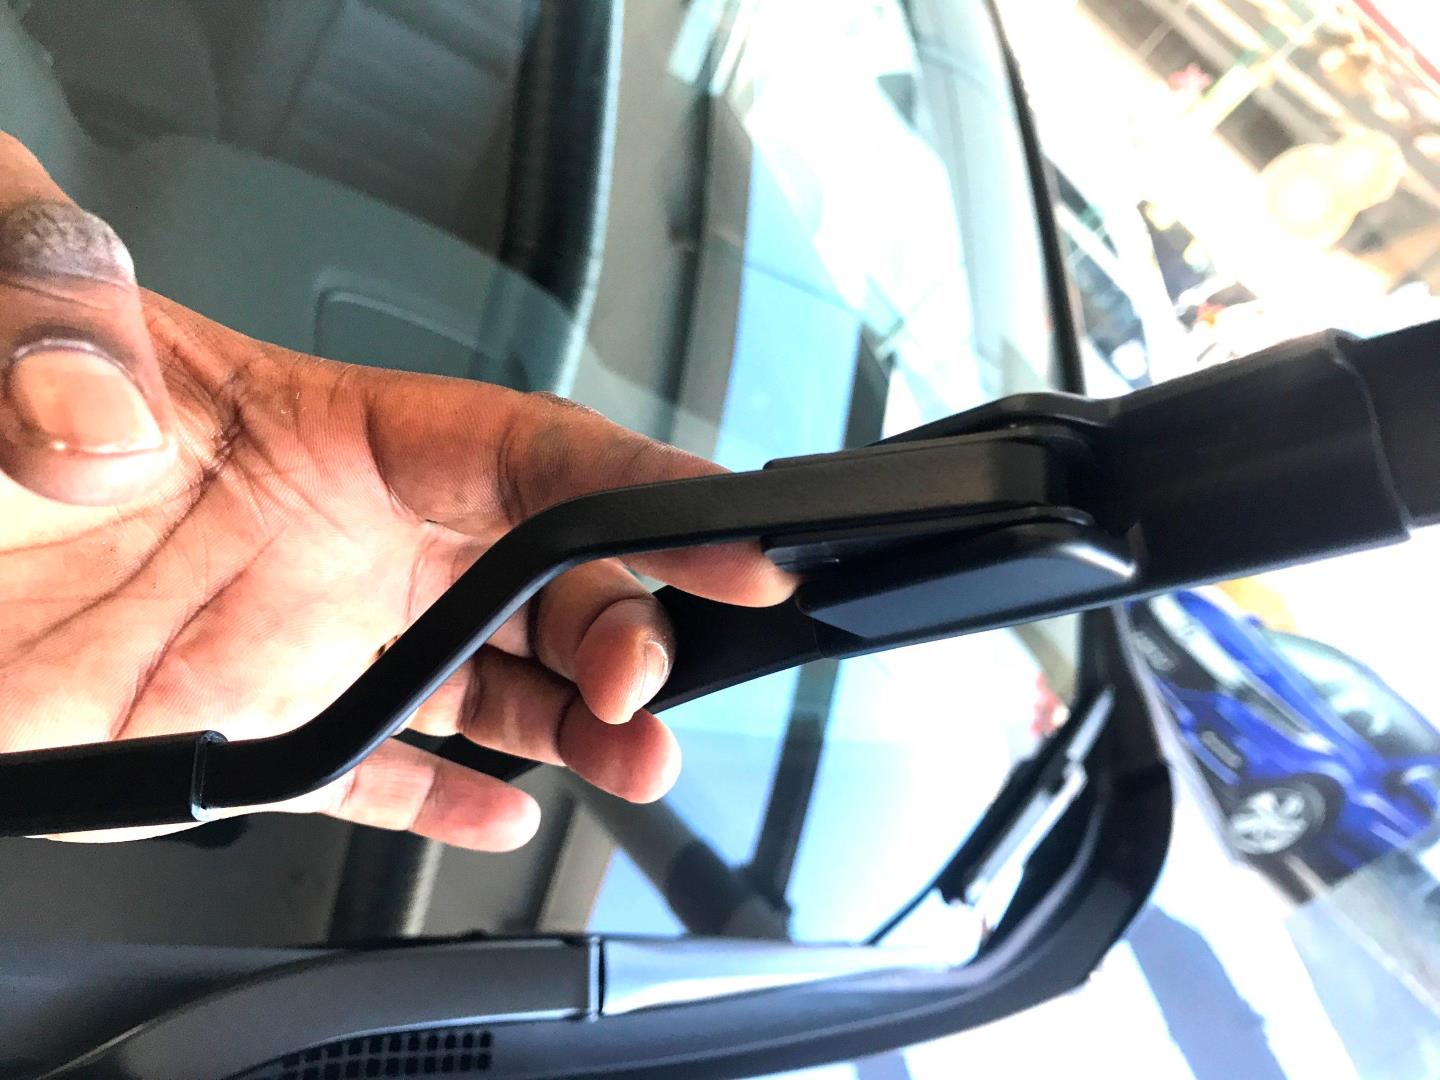
5. To remove the blade, you first need to locate the retaining catch in the small box-shaped fitting of the blade, where it slips onto the reverse end of the hook.
6. Stick your index finger into the catch opening, locate the retaining tab, and push upwards.
7. Now, holding the tab catch up with your finger, use your other hand to pull the wiper towards you, so it slides down the hook, in a direction towards the bottom of the wiper arm. You may have to wiggle it a bit to get it moving, but take care to keep the retaining clip pressed upwards, and don’t force it!
8. The blade will begin moving down the shaft and within about one centimetre it will slide free of the shaft.
9. Now you fit the replacement, guiding that box-section catch housing into the reverse hook end of the wiper arm. You don’t have to fiddle with the catch now, simply slide the new blade outwards (towards the passenger side of the car) onto the hook until the new blade clicks home. You will hear a slight “click” as the catch, which is automatically under spring tension as your work it properly into the hook, clicks into the slight retaining slot that has been machined into the hook. The pictures accompanying this article give a good explanation of how this works.
10. Use the same procedure to replace the passenger side blade. You are done! You will be amazed at how good you feel when you switch on the wipers now. There is even a song about it. It’s called: “I can see clearly now!”
*Please note, although this is a very simple DIY job, taking at the most five-to-10 minutes, if you have any doubts about it, let an expert at a workshop show you how. And if your car is under warranty (as it will be if it’s the latest-generation Honda CR-V), let the service technician at the dealership do the job.