
How to change brake pads
How to change brake pads


By Stuart Johnston
Changing the front disc brake pads on your car normally takes a couple of hours the first time you do it. Brake pads are designed to be replaced at regular intervals, and the job requires no special tools, apart from a set of socket spanners to loosen the calliper retaining bolts, necessary on some models.
Changing the front brake pads on your car is a job you can easily do yourself if you follow a few simple procedures. It will also save you the labour costs of having the job done by a repair outlet, and apart from tools like a jack, wheel spanner, a set of socket spanners and socket wrench, pliers, a G-clamp and a brad-faced screw driver, no special equipment is needed.
What does changing brake pads involve?
In short, it involves jacking up each of the front wheel of your car, removing the wheel to expose the bake disc and calliper, and then removing the old pads and replacing them with new brake pads. But there is a procedure to be followed that involves some common-sense, and some pre-preparation.
Before you start
Find a nice quiet place with a level piece of ground to park your car on, free of distractions. Chock the wheels that will remain on the ground with bricks or wood blocks to prevent the car from rolling forward or backward and off the jack.
Step One
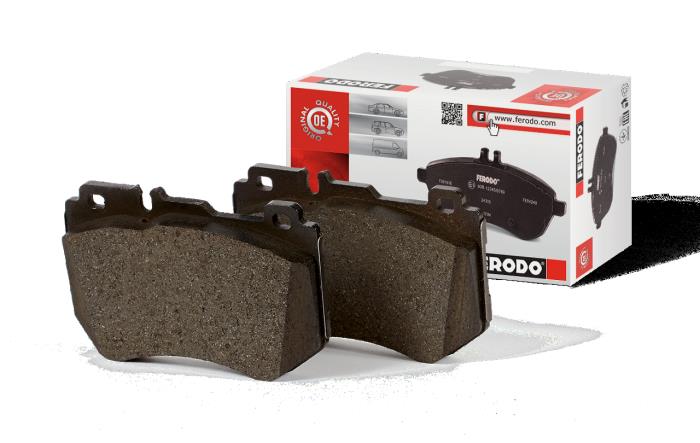
Ascertain the exact model and year of your car, so that you can buy the correct replacement brake pads. Original equipment brake pads bought from a dealership will be more expensive. Good quality aftermarket brake pads are available for most car models. Check with a motor spares outlet that you trust.
Step Two
Having parked the car on level ground with the wheels blocked to prevent rolling forward or backwards of the vehicle, remove the hubcap (if fitted) and loosen the wheel nuts just one or two turns, using the factory-fit wheel spanner. If the wheel nuts are very tight, you may need to slip a long pole over the handle-end of the wheel spanner to gain extra leverage to loosen them.
Step Three.
To gain easy access to the brake calliper and wheel disc, it will probably necessary to turn the steering wheel so that that the calliper and disc face outwards, away from the wheel arch of the car. With the wheel’s nuts slightly loosened, jack up the car. It is a good safety precaution at this stage to position a supporting stand under the car so that even if it moves on the jack it will not drop down. Then loosen the wheel nuts completely and remove the wheel. Make sure the jacked up car still feels secure.
Step Four
Identify the brake and calliper. The calliper is that metal shroud that fits over the brake disc and has hydraulic hoses connected to it.
How it works is that, when you press the brake pedal, hydraulic fluid in the brake hose is forced into a sealed cavity within this calliper. The increased pressure causes a piston to extend out of the calliper and this piston then presses up against the brake pad and squeezes the pad against the disc, causing it to stop rotating. Release the pressure, and the fluid then returns back to its reservoir and the pad retreats back into its “ready” position. The brake works pretty much the way a bicycle’s brakes works, except the pressure on those little bicycle brake “blocks" is cable-activated, not hydraulic.
Step five
Most modern cars have brake callipers that can be swivelled upwards, leaving the disc and the pads, on a locating housing that remains in place, exposed. To swivel the calliper upwards and away from the disc, a retaining bolt, usually at the lower side of the calliper and on the inward side of the unit, closest to the engine, must be loosened and withdrawn.
Once the upper calliper section is out of the way it is a good idea to attach a small piece of wire to secure it out of the way, thus preventing the still attached brake hose from becoming pinched.
The old pad, still snug up against the brake disc s are then removed by withdrawing spring clips, or similar retaining devices, on the retaining housing. Check carefully to see how these clip retainers work and don’t remove them all at once before you understand how they operate. Sometimes the old pads may need some gentle jiggling to get them to move out of their retaining slots.
Step six
The next step is to give everything a good clean with something non oily – don’t use petro! There are special fluids for this available from spares shops. And brush away excess grime and brake dust. Then insert the new pads in their retaining housing, replacing the clips carefully and making sure that the new pads will remain in place.
Please note, some callipers need to be removed completely to do this job. Once you loosen the lower retaining bolt on the calliper, if it does not swivel upwards then it means that it has to be unbolted and the whole calliper as to be then removed. But as the brake hose is still secured to this calliper, again make sure you use some sort of support to the calliper so that it does not hang on the brake hose and damage it.
Step seven
With the swivel type calliper up and outwards, so to speak, the activating piston must now be forced back inside the housing.
As the previous brake pads have worn, the activating piston has been extended further and further outwards towards the (ever-thinner) pads. The new pads will be much thicker and unless you squeeze the piston back the calliper will not slide back over the new pads.
At this stage it is good idea to remove the filler cap on the brake fluid reservoir to allow fluid and air to return upwards along its path when you squeeze the piston back into its housing. Be careful not to damage the piston face when you force it back. Using a G-clamp with a small piece of thin wood is a good idea for this.
*Older cars need to have the brake pads changed with the callipers still in place. This is quite simple, by removing simple pad retaining pins and clips. The tricky part is to force the brake-force activating piston back into its housing, and here care must be taken to do this slowly without damaging its surface.
Step eight
With the piston back in its housing and now flush with the calliper’s inner surface, the calliper will be able to be fitted over the new pads into position. The calliper is then secured by re-inserting the lower retaining bolt.
Step nine
Check the reservoir to see that the correct level of brake fluid is still present. If not top up, and then replace the cap.
Step 10
Replace the wheel, tightening the nuts moderately with the wheel still in the air so that it aligns correctly. Then lower the car off the jack and give each wheel nut a good tightening, but do not overtighten.
Step 11
Repeat the whole exercise with the opposing side wheel.
Step 12
Take the car for a short test drive. The brakes should bite evenly and any initial sponginess should disappear after the first one or two stops from low speed.
Good luck!